
Hey. In this quick blog I outline the settings I used to make the most out of my new monitor. It took a while to get right, but once its right the C27HG70 makes for an all round decent display.
About
Some key technical details about the display
- Aspect Ratio 16:9
- Display Type QLED monitor / TFT active matrix
- Features Black eQualizer, 92% Adobe RGB colour gamut, FPS Mode, Flicker Free technology, RTS Mode, Eco Saving Plus, Eye Saver Mode, Low Input Lag, Quantum Dot Technology, 125% sRGB colour gamut, Super Arena Gaming UX, 88% (NTSC 1976) colour gamut, HDR (high dynamic range), Screen Size Optimizer, Refresh Rate Optimizer, Game Color Mode, Custom Key
- Energy Class Class D
- Energy Consumption per Year 91 kWh
- Power Consumption (On mode) 62 W
- Diagonal Size 27″
- Viewable Size 26.9″
- Curved Screen Yes (1800R)
- Adaptive-Sync Technology AMD FreeSync
- Built-in Devices USB 3.0 hub
- Panel Type VA
- Native Resolution Ultra WQHD 2560 x 1440 at 144 Hz
- Brightness 600 cd/m²
- Contrast Ratio 3000:1
- Colour Support 1.07 billion colours
- Response Time 1 ms
- Horizontal Viewing Angle 178
- Vertical Viewing Angle 178
- Backlight Technology LED backlight
- Colour Matte dark blue grey
- Dimensions (WxDxH) 62.48 cm x 39.07 cm x 55.67 cm – with stand
- Weight 6.3 kg
Setup
A setup for flexible gaming and casual desktop use.
- Windows 10 Pro
- Intel i7 8086K
- nVidia RTX2080 Super
Displayport cable
The first thing I needed to do to set this up is take the Samsung Display Port cable that came with the display, open a window and throw it out towards the garbage. It was useless, the screen would continually flicker horribly. Even a Belkin cable I bought from Poundland 8 years ago did a better job !
I recommend getting a Displayport certified cable https://www.displayport.org/product-category/cables-adaptors/ or even raiding the local poundland it seems.
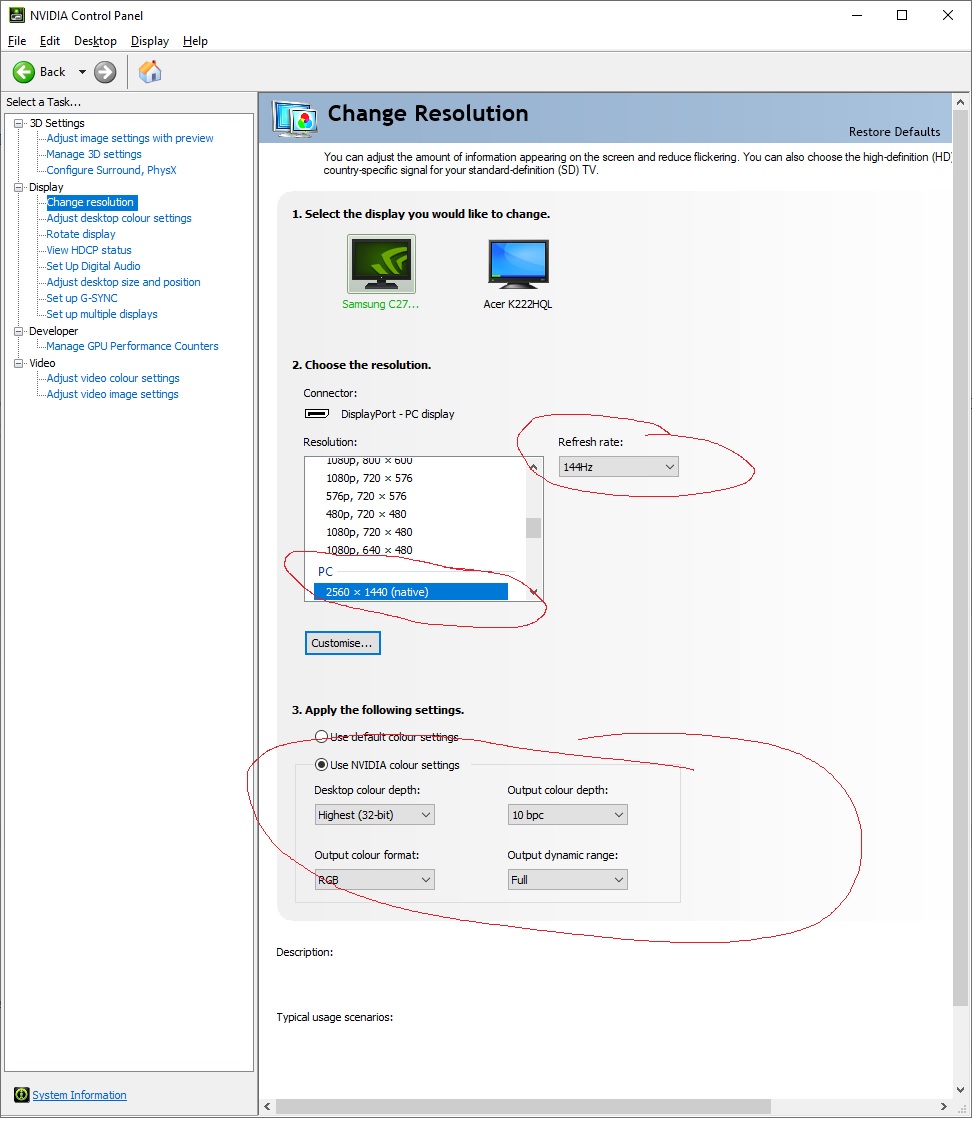
Resolution and colour depth
Set the native resolution for the screen. 2560 x 1440 @ 144Hz and enable 10 bits per channel colour depth and full dynamic range.
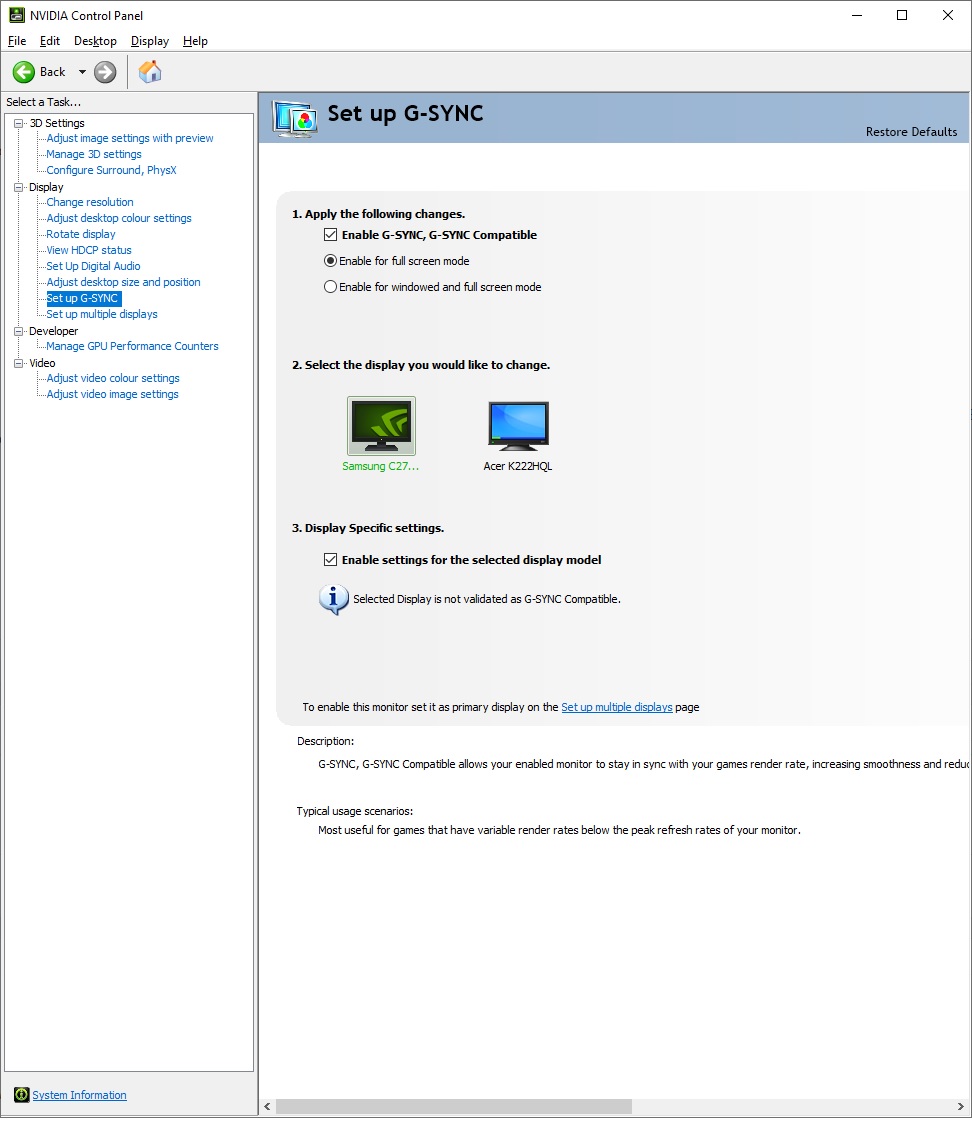
Adaptive Sync
Don’t forget to turn on nVidia Gsync
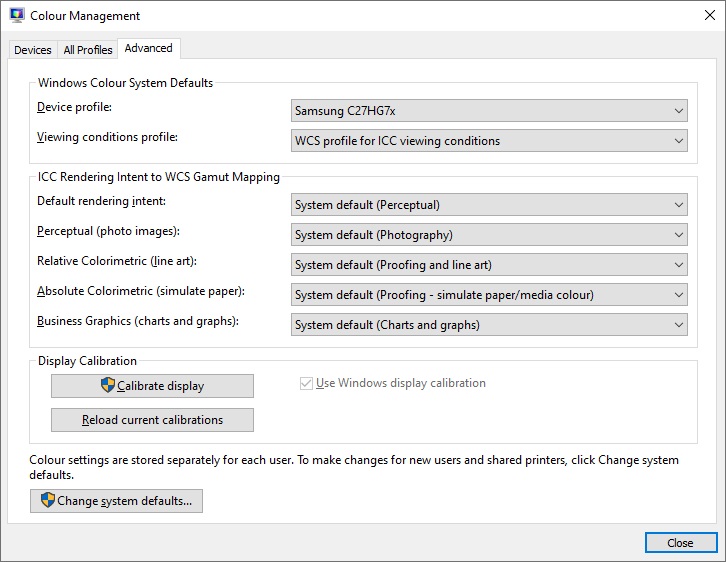
Colour profile
It is useful to tell your operating system what colours the display can output. Samsung provide a .icc profile file for this.
Screen setup
Use the on-screen controls (little d-pad button to the rear right of the screen)
I set it as the following :
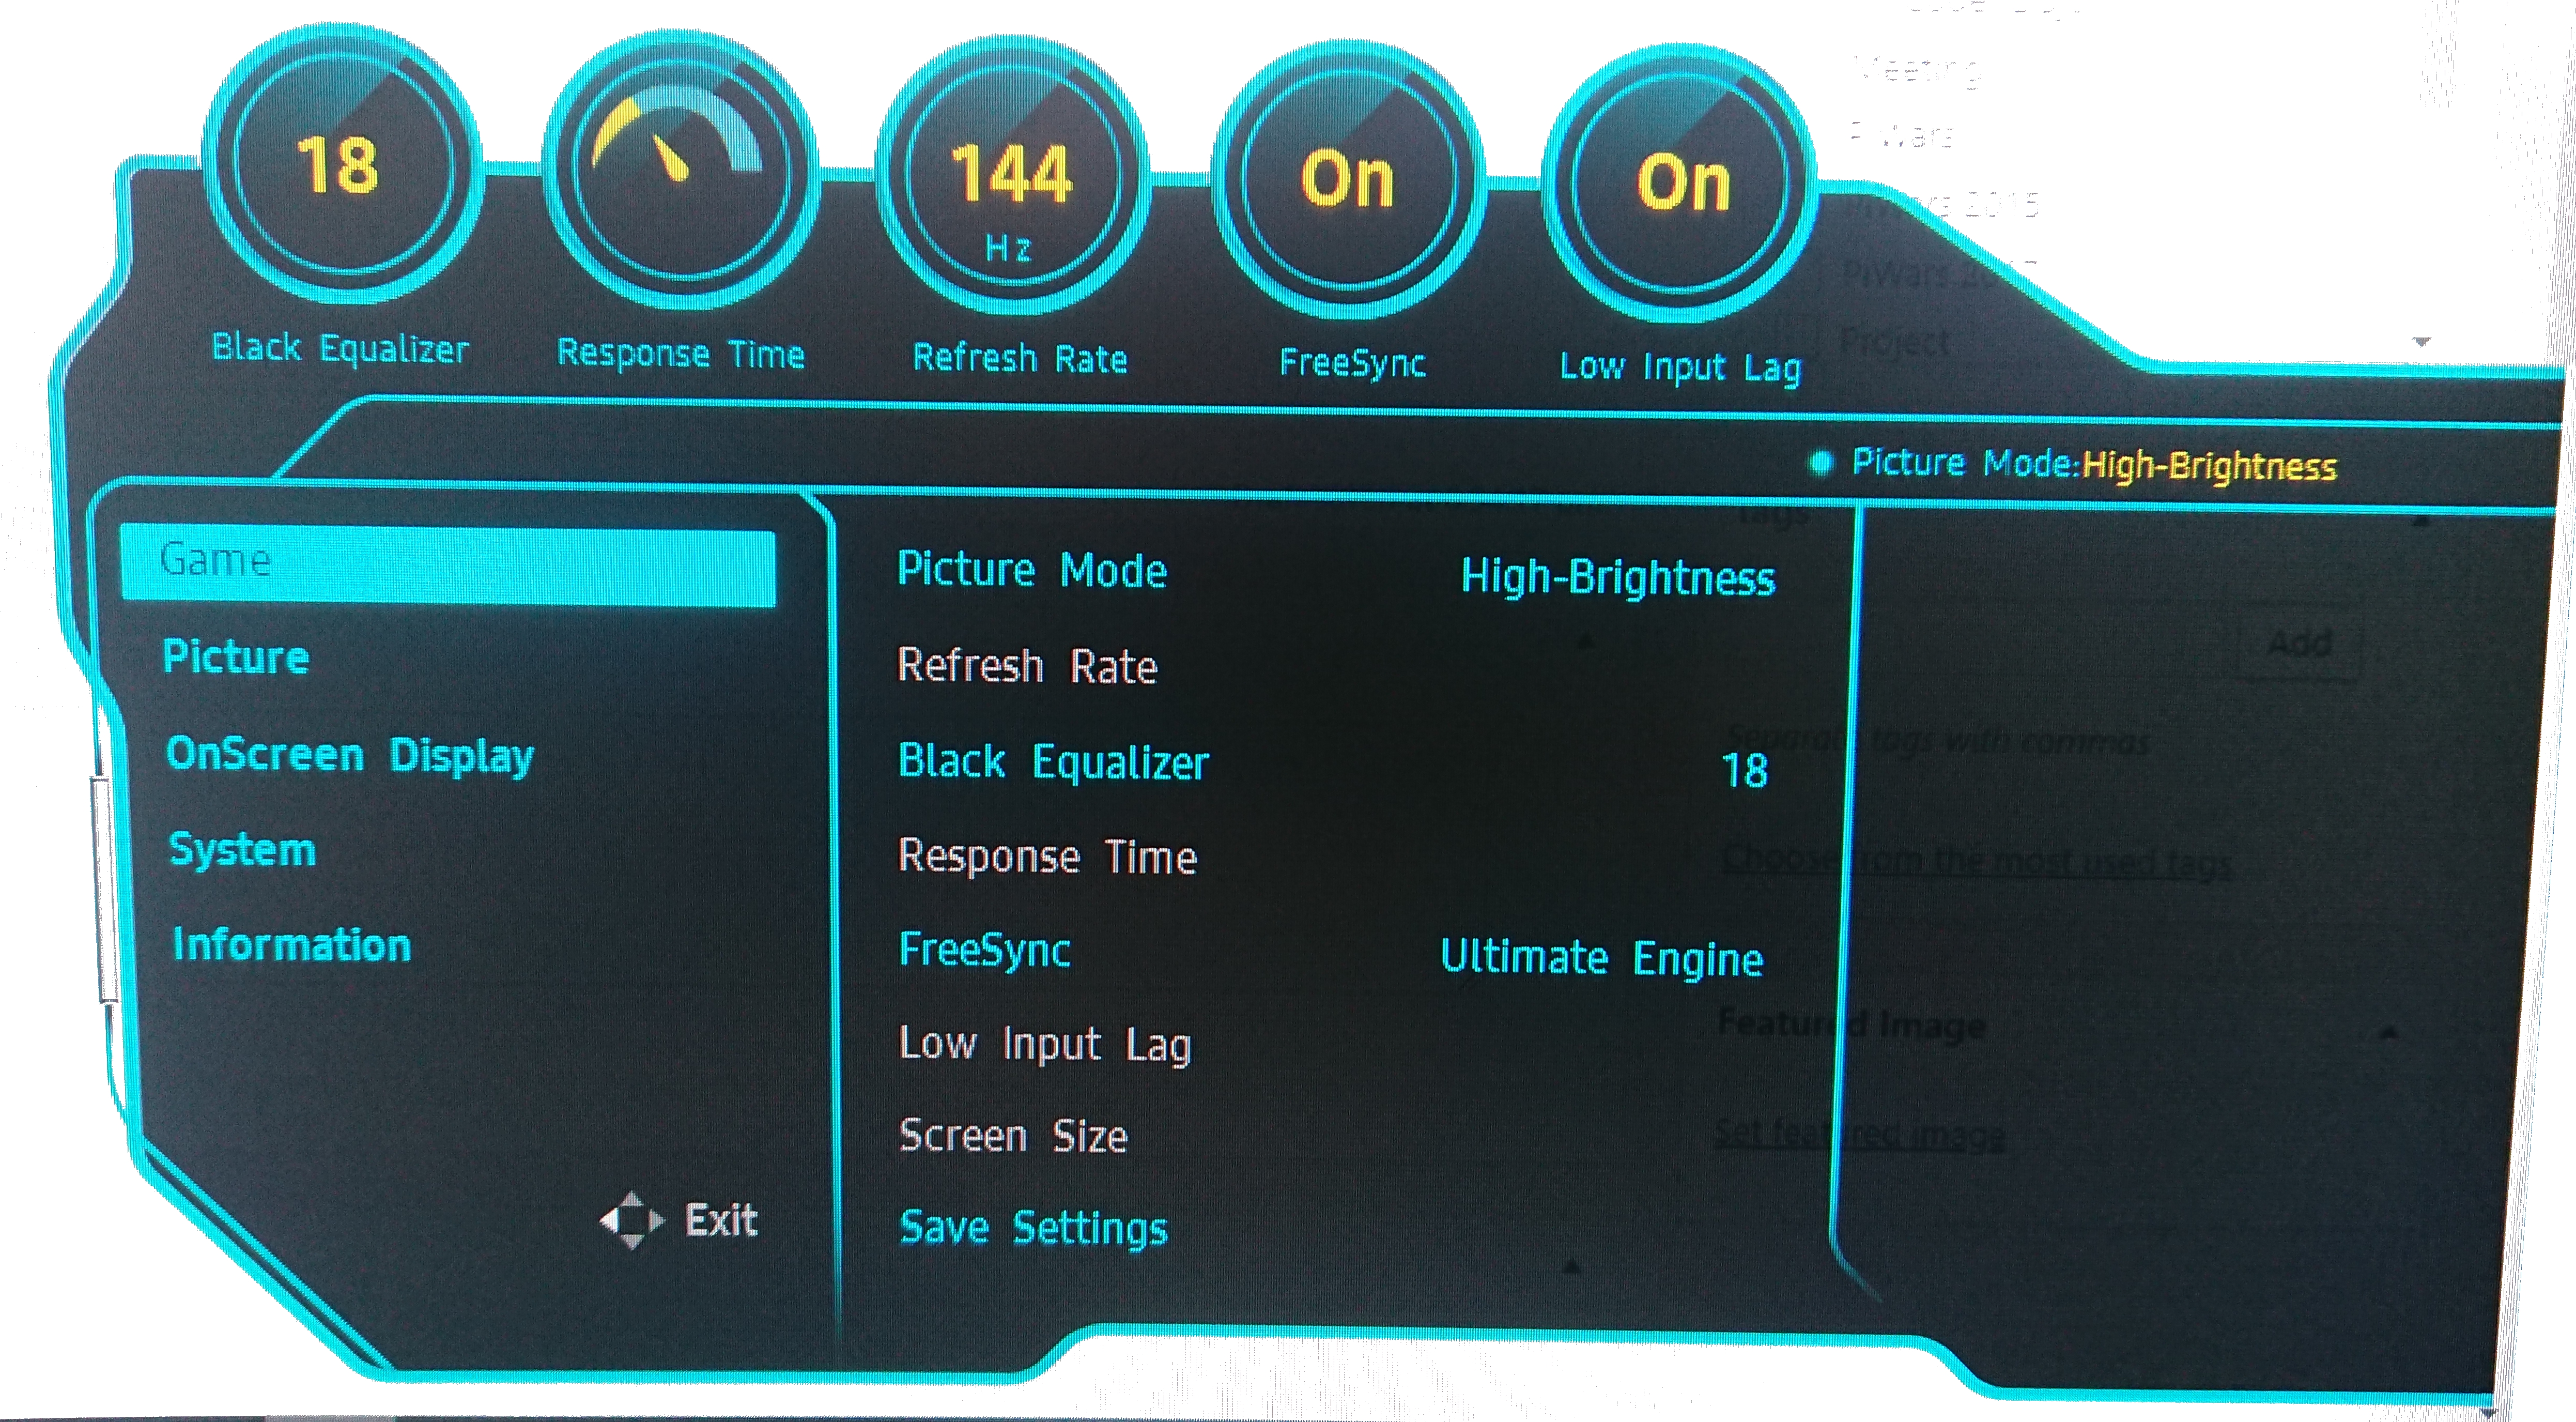

I found the contrast and sharpness to be particularly important to reduce “VA glow”. For a few weeks I would notice that in the darker parts of some games, when the screen is changing (walking forwards) some objects would emit a glowly edge. I came to found that this is known as “VA glow”. Due to the panel technology this is a common problem. Some users attributed it to the freesync technology. I was able to tune the settings to avoid the glow. Setting the sharpness below 60 really seemed to exacerbate it the problem!
HDR
Don’t be tempted to turn HDR on for the desktop for general use, it seems to reduce the tonal depth of the desktop and give it a high brightness, low contrast glimmer look. However, if you consuming HDR content full-screen from either Youtube, VLC or a Bluray player, then do turn it on for that session, it really does make HDR content look impressive. Not something I can really show you here !
Game tuning
Some games let you set the max FPS the game will run at, this will help reduce heat from the graphics cards for games that would usually run at the max refresh rate of the display (144fps). In Witcher 3, I have to set it to unlimited as it only has an option for 30 or 60 (probably being an older game).
With the adaptive sync technology enabled, I can get 90 fps in Witcher 3 and it looks really smooth, again I can’t show you but it is impressive looking.
Hope this has been helpful.